Installation
If installing for the first time or updating the plugin, you can download the latest version of the installer by clicking here or on the account icon in the top right of the Acedia Audio webpage, selecting 'products', then choosing Kerosene and the downloading the relevant installer for your operating system.
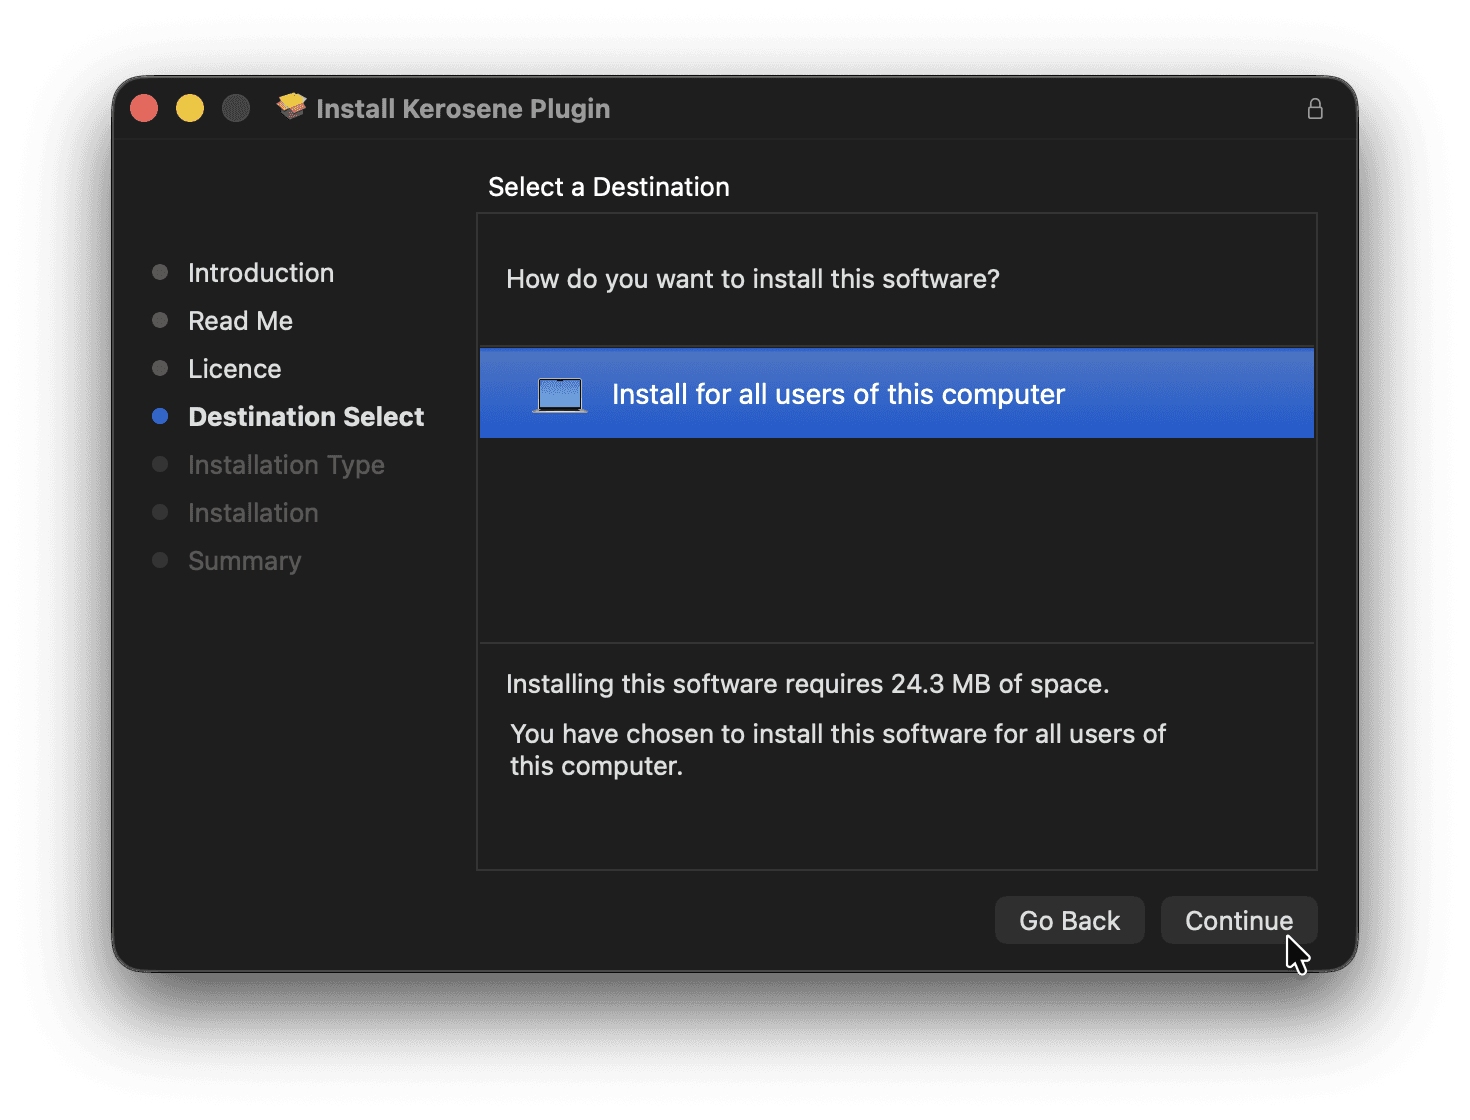
Once downloaded, you can use the installer which will guide you through the installation process.
Trial & Activation
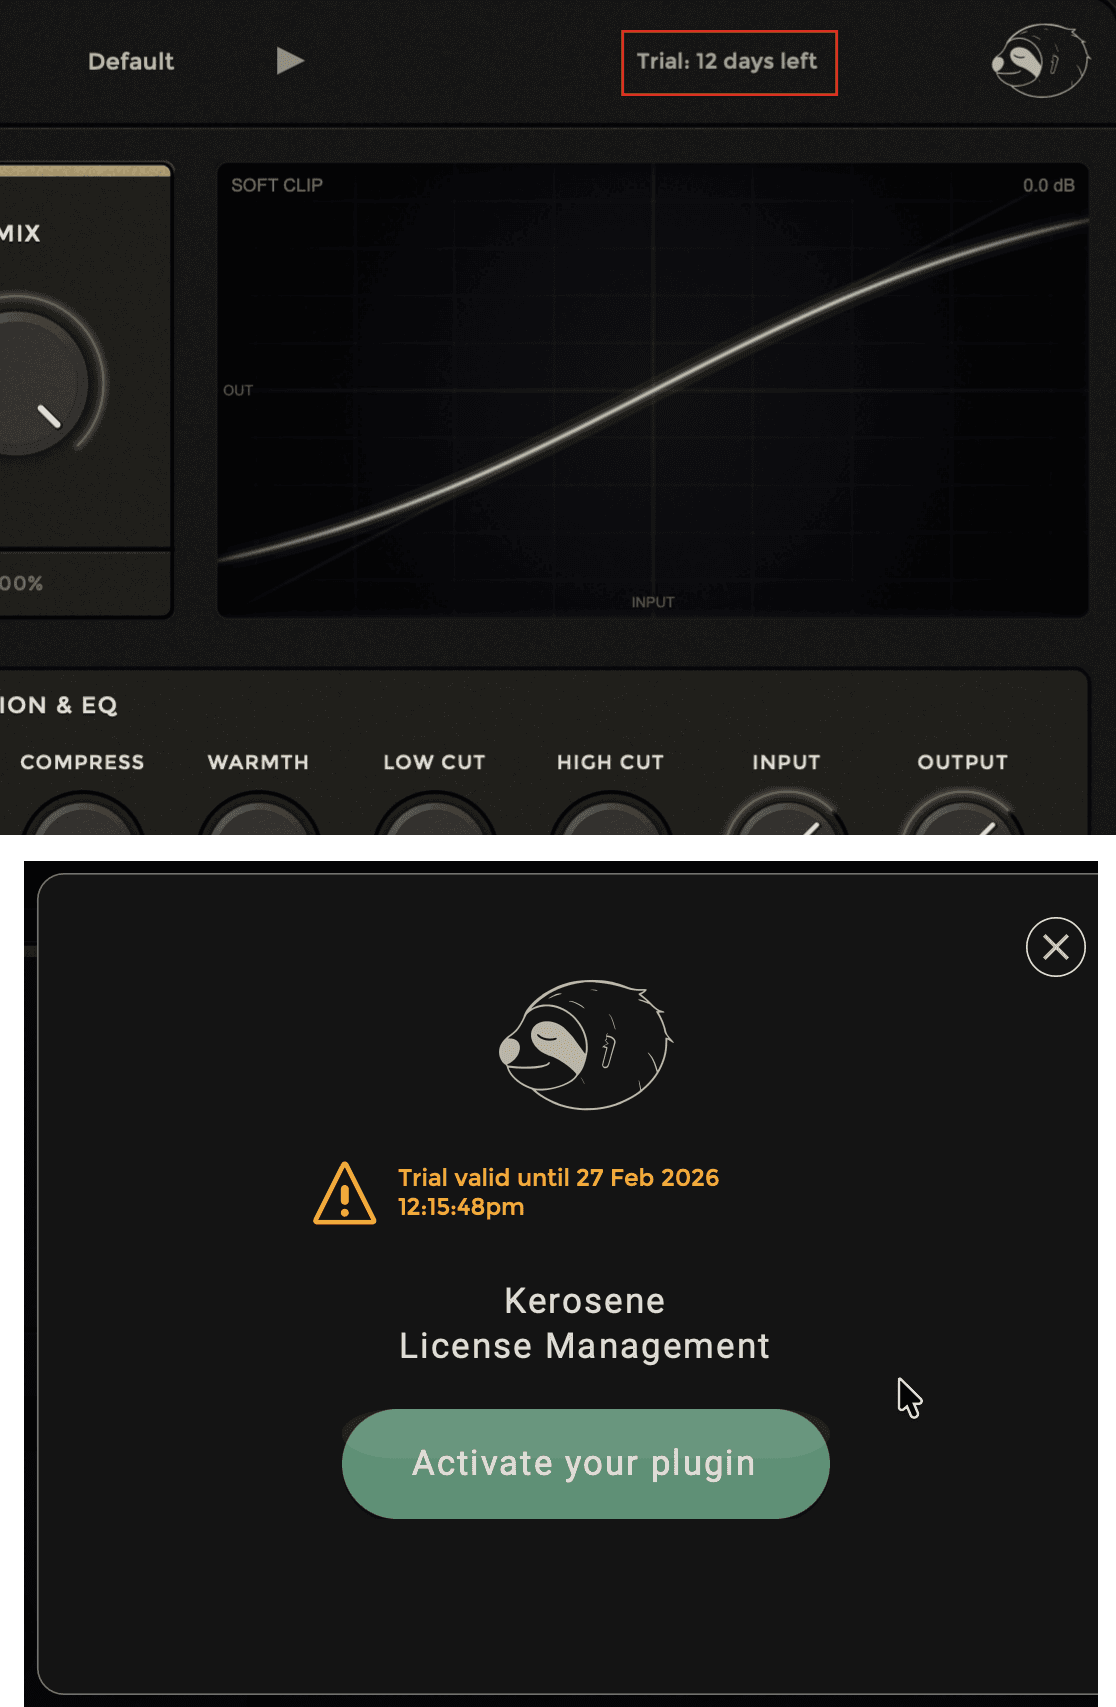
When using Kerosene for the first time you will be greeted with the activation screen, clicking 'Activate your plugin' will move you onto the next screen where you will be able to select between a offline and online activation, for most cases you will want the online activation by clicking the 'Let's go!' button.
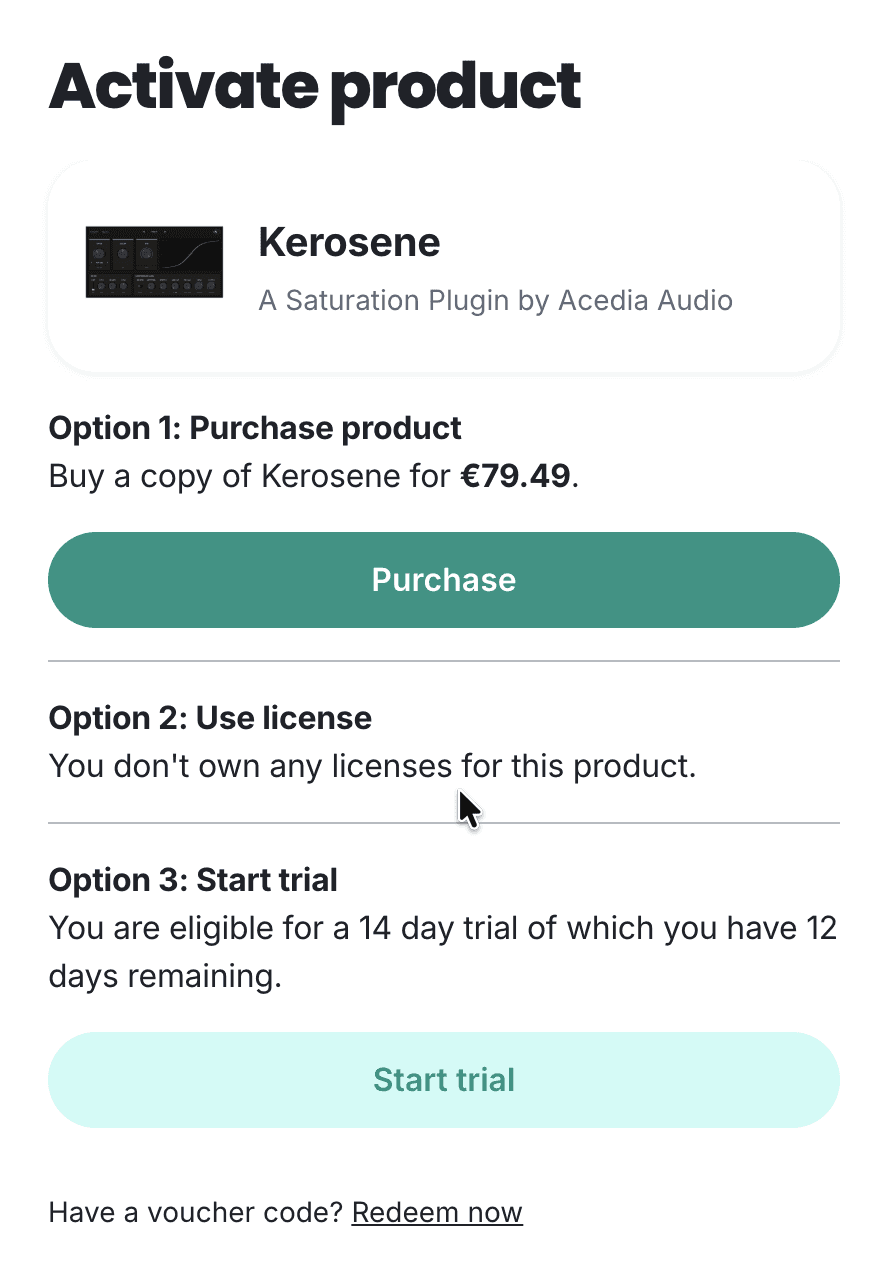
This will bring you to the Acedia Audio website, where you will be asked to sign in if you have not already. After logging in, you will be able to activate your paid license or start a free 14 day trial.
While in trial mode, you will see a message in the top right which will state how many trial days you have left, click on this message to be brought back to the activation window.
Getting Started & Functionality
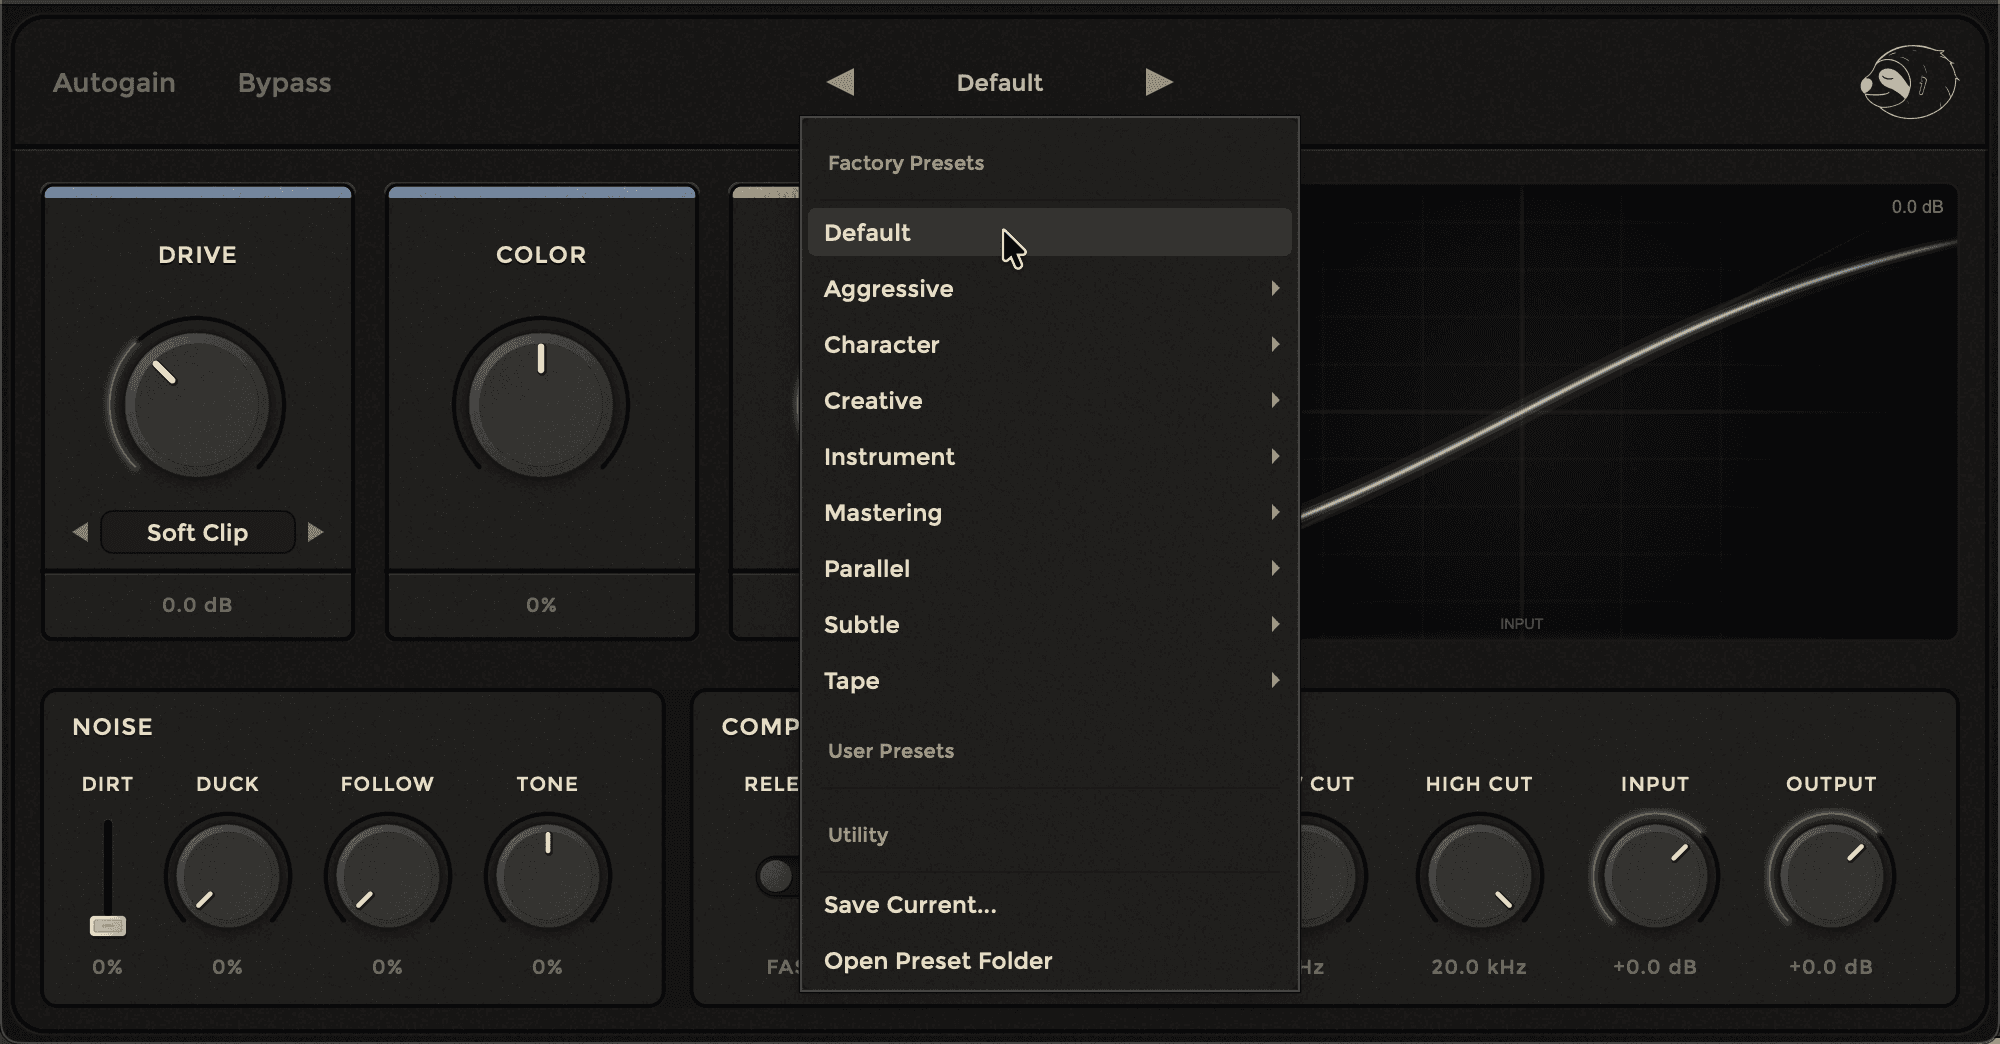
When opening Kerosene for the first time, all values will be set to their default state with no saturation applied.
The interface is split into two areas: the main controls across the center (three dials and the visualizer) and the advanced panel along the bottom (noise, compression, EQ, and level controls).
Main Controls:
The "DRIVE" dial controls the amount of saturation applied to your signal, ranging from -12 dB to +24 dB. Double-click the dial to reset it to 0 dB.
Directly beneath the DRIVE dial you will find the saturation type selector (you are able to select the type either by the arrow keys beside the selection, or by clicking into it and selecting your desired option). The four available modes are:
Soft Clip — smooth, transparent saturation with gentle harmonic rolloff.
Hard Clip — aggressive clipping with a harder edge.
Tube — asymmetric saturation that emulates valve-style harmonic colouring.
Tape — warm saturation with magnetic hysteresis character.
Each mode produces a different harmonic profile and will visibly change the shape of the transfer curve in the visualizer.
"COLOR" controls the tonal character of the saturation. This is a bipolar control — at center (0%) it is neutral, turning left produces a warmer/darker tone, and turning right produces a brighter/more present tone. Double-click to reset to center.
"MIX" is a dry/wet control which allows you to blend the saturated signal with the original dry signal. At 100% you hear only the processed sound, at 0% you hear only the dry signal. This is useful for parallel saturation techniques. Double-click to reset to 100%.
The visualizer displays a real-time view of how your signal is being shaped. The curve responds to changes in drive, color, saturation type, filtering, and compression. When audio is playing, you will see the live signal trace mapped through the curve. Higher drive and dirt values will produce visible changes in the curve's intensity and texture.
Top Bar:
In the top left you will find the "Autogain" toggle, which when enabled automatically compensates for volume changes caused by the saturation — this allows you to push the drive without the signal getting louder, making it easier to judge the tonal effect rather than just the volume increase.
Next to it is the "Bypass" button, which allows you to quickly hear the dry signal in a single click.
The preset selector is found at the center of the top bar. The Acedia Audio logo is displayed on the right.
Advanced Panel — Noise Section:
The left side of the advanced panel contains the noise engine, which allows you to add analog-style dirt and texture to your signal.
"DIRT" is a vertical slider that controls the amount of noise and grit introduced into the signal. At 0% no noise is added.
"DUCK" controls how much the noise ducks in response to your audio signal. At higher values, the noise will be reduced when audio is present and become more audible during quieter moments — useful for keeping the texture present without it competing with your signal.
"FOLLOW" controls envelope following, where the noise reacts to and follows the dynamics of your input signal. Higher values make the dirt more responsive to louder transients.
"TONE" adjusts the tonal balance of the noise. Turning left produces darker, bassier noise, and turning right produces brighter, more hissing noise.
Advanced Panel — Compression & EQ Section:
The right side of the advanced panel contains compression, EQ, and level controls.
The "RELEASE" toggle switches the compressor's release character between a fast and slow response.
"COMPRESS" controls the amount of compression applied post-saturation. This uses a soft-knee design with a sidechain high-pass filter to prevent low frequencies from pumping the compressor — useful for taming dynamics after heavy saturation.
"WARMTH" adds harmonic saturation within the compressor stage, introducing additional analog-style warmth on top of the main saturation engine.
"LOW CUT" and "HIGH CUT" are high-pass and low-pass filters that allow you to shape the frequency range of the processed signal. Use low cut to remove rumble or tighten the low end, and high cut to tame harshness or focus the saturation on a specific range.
"INPUT" and "OUTPUT" control the signal level going into and coming out of the plugin. Use the input to drive the saturation harder or softer, and the output to set your final level.

Saving & Loading
The preset management system can be found at the top of the GUI, you can use the system to save or load presets.
On startup the plugin will select the “Default” preset automatically, use the arrow keys on either side or click into the selection and pick what preset or action you would like to perform.
To manage or delete user presets, select the “Open Preset Folder” option, then find the presets you would like to make changes to.